As I write this post, cookie season is long over (thank GOODNESS!). Cookie season this year was exceptionally stressful, but it was well worth it.
Last year we used a lot of cookie based recipes on our booth posters. The girls loved that, so I made sure to print those out before today's meeting. Being a little more than a week away from cookie booths, and just days before cookie delivery, we used today's meeting to prep all of our booth posters. I'm that crazy leader who lets the girls dictate what they want to use for their materials. Long story short, so much glitter everywhere! And that glitter followed us around for all of cookie season. Anyway, the girls made 2 tri-fold poster and 4 hand held signs. We ran out of time to do our cookies from home donation jars, but they told me what they wanted I did that once I got home (again, all the glitter, oh my goodness!). Everything looked cute, but if I can, next year, I fully intend on discouraging the glitter (though knowing these girls, they will insist on more glitter).
Showing posts with label prep. Show all posts
Showing posts with label prep. Show all posts
Monday, April 29, 2013


Daisies, Year 2, Meeting 18
So much to do, so little time to do it! Looking at today's meeting in black and white, you would think it was boring, but it was far from it!
Thinking Day falls in the middle of our cookie season. So we held our SU Thinking Day event at the beginning of February. Our troop was tasked with creating a board about Venezuela. So it gave us the chance to learn about this country. Venezuela is such a beautiful country with a very rich and interesting history. Like last year, I printed out several maps and a bunch of pictures. We talked about what everything was and learned about the country. Once that was done, I handed them over to the girls and let them go nuts with a board, some glue and a few markers. It turned out really well. Once they were done, I added the Venezuelan flag and national flower on the side of the board to stick out a little. They did an amazing job!
Thinking Day falls in the middle of our cookie season. So we held our SU Thinking Day event at the beginning of February. Our troop was tasked with creating a board about Venezuela. So it gave us the chance to learn about this country. Venezuela is such a beautiful country with a very rich and interesting history. Like last year, I printed out several maps and a bunch of pictures. We talked about what everything was and learned about the country. Once that was done, I handed them over to the girls and let them go nuts with a board, some glue and a few markers. It turned out really well. Once they were done, I added the Venezuelan flag and national flower on the side of the board to stick out a little. They did an amazing job!
Saturday, August 4, 2012
Investiture and Rededication prep, take two, part one!
New troop, new girls. Traditionally speaking, investitures are supposed to take place around meeting four. I'm not yet sure as to exactly when we will be working this into our fall program, but it's on the list!
At the beginning of last year, we did a cute investiture and rededication that involved a poster with the Daisy petals and a cute "play" about it. So that's out for this year. After flipping through a booklet I got at our local GS store, I got an idea on what we could do, but still keep it within the Daisy theme- ribbons! So, challenge time:
Challenge 1: Do the ribbon theme, and figure out the logistics of it
Challenge 2: Do this as cheaply (inexpensively) as possible
Challenge 3: Figuring out when to do this
Challenge 4: Coming up with "new" dialog for the girls to say during the ceremony
Challenge 5: Figuring out the logistics of the ceremony
Challenge 6: Trying to figuring out the when part
First up, with challenge four- I have a few ideas already. I've been researching how we can do this. It also depends on how many girls we will have to participate, so the exact logistics will have to wait until the time comes. My first idea is to do a cute skit about Juliette Gordon Low. I found an adorable story on scouting web. The story had the girls do various actions for certain words. We worried back in October if the girls would be able to memorize their lines. This is easier since we can do it so that all the girls do the action (that story has one girl at a time doing it). My next idea was to do a series of songs. There's so many more songs we haven't introduced yet, but could. The girls catch on to them quickly, so that would be easy enough to accomplish, and the parents love having moments like that to record. The next idea involves an actual skit, though with how much time we might not have, it might not be the best idea I've had, though still cute. Thankfully, we have some time to decide.
Challenge five isn't entirely horrible. After looking through many resources, I'm sure we'll be able to find a fresh way to do this. Challenge one and two go along with challenge five, but once we sit down and do some solid planning, I know we'll figure it out.
I'm hoping that once recruitment season is over and we have a set meeting place, the logistics of our investiture and rededication will fall right into place. For the most part, we have an idea of where we want to take this, and that's half the battle!
At the beginning of last year, we did a cute investiture and rededication that involved a poster with the Daisy petals and a cute "play" about it. So that's out for this year. After flipping through a booklet I got at our local GS store, I got an idea on what we could do, but still keep it within the Daisy theme- ribbons! So, challenge time:
Challenge 1: Do the ribbon theme, and figure out the logistics of it
Challenge 2: Do this as cheaply (inexpensively) as possible
Challenge 3: Figuring out when to do this
Challenge 4: Coming up with "new" dialog for the girls to say during the ceremony
Challenge 5: Figuring out the logistics of the ceremony
Challenge 6: Trying to figuring out the when part
First up, with challenge four- I have a few ideas already. I've been researching how we can do this. It also depends on how many girls we will have to participate, so the exact logistics will have to wait until the time comes. My first idea is to do a cute skit about Juliette Gordon Low. I found an adorable story on scouting web. The story had the girls do various actions for certain words. We worried back in October if the girls would be able to memorize their lines. This is easier since we can do it so that all the girls do the action (that story has one girl at a time doing it). My next idea was to do a series of songs. There's so many more songs we haven't introduced yet, but could. The girls catch on to them quickly, so that would be easy enough to accomplish, and the parents love having moments like that to record. The next idea involves an actual skit, though with how much time we might not have, it might not be the best idea I've had, though still cute. Thankfully, we have some time to decide.
Challenge five isn't entirely horrible. After looking through many resources, I'm sure we'll be able to find a fresh way to do this. Challenge one and two go along with challenge five, but once we sit down and do some solid planning, I know we'll figure it out.
I'm hoping that once recruitment season is over and we have a set meeting place, the logistics of our investiture and rededication will fall right into place. For the most part, we have an idea of where we want to take this, and that's half the battle!
Wednesday, May 9, 2012
Spring, Meetings 5 & 6
I didn't write a blog last week because we worked exclusively on our super duper top secret project. This week we finished it, so now I can finally tell you all!

First off, I am so proud of our scouts for keeping this super duper top secret project a secret! This was our Mother's Day project, hence why we kept it a secret. You'll never guess how much this project cost. Seriously, try! If guessed less than $5, you win!

First off, I am so proud of our scouts for keeping this super duper top secret project a secret! This was our Mother's Day project, hence why we kept it a secret. You'll never guess how much this project cost. Seriously, try! If guessed less than $5, you win!
Supplies:
Small coffee filters
Markers
Staples/stapler
Staples/stapler
Spray bottle with water and vinegar
Pipe cleaners
Plastic bottles
Modge podge or watered down liquid glue
Tissue paper
Beans, rice, or something else to put in the bottom of the bottles
Beans, rice, or something else to put in the bottom of the bottles
My awesome Co and I experimented on this before we did the craft with them, just so we knew how to do it (since they always have questions). We had seen a number of how-to's for the the vase and flowers, so it was a matter of figuring out what was going to work best for our girls.
Step one is coloring the coffee filter, which we did during meeting two. It's so easy, really! Simply lay out a coffee filter, color a few squiggles around it (don't color in the whole filter), and spray it with your watered down vinegar. Then, let it dry. It takes roughly 2-3 hours to dry on its own, hence why did this a few meetings before. When the filters dry, it will look like you tie-dyed them. If you use contrasting colors, you'll get some really cool effects too.
Step two is making the flower. You'll want to use about 5-6 filters for this. Layer/stack your filters and then staple it in the middle to hold them together. Start by picking up the top/first filter and scrunching it up. Then, one by one, crumple up each layer around that center layer. Once all of them are done, tape or wrap your pipe cleaner at the bottom. Then, while holding it at the bottom, carefully open up your newly formed petals. When you're done, it will look like a flower!
Step three is the vase/bottle. Essentially, you will be decoupaging it. Using a paint or foam brush, cover your bottle with modge podge or watered down liquid glue. Place tissue paper scraps all over the bottle, and make sure you cover it! Brush modge podge or glue over the layer of tissue paper to seal it on there. This will also take several hours to dry, so you might want to do this a few meetings ahead of time too.
Once all of that is done, you may want to place something like dried beans or rice in the bottom of your new vase before sticking your flowers in. For an additional measure, you might want to coat the vases with a clear lacquer. But, that's it! The total cost of this project is roughly $3. A pack of small coffee filters is about a dollar, and you can buy a large pack of pipe cleaners and tissue paper at most dollar stores, and you will have leftovers of both. We let the girls make more than one flower and vase, and still had lots of leftovers. When our moms saw them, they loved it too!
These vases were also the perfect opportunity to work in a lesson on being considerate and caring. We read a passage from the guide book and related this to every day life. We talked about simple thing we can do to be considerate and caring, such as using manners and going out of our way to be nice to people. The girls had way better ideas than we did about being considerate and caring. Can I just say, again, these girls are SMART and are going to set the world on fire!
For today's meeting (6), we dove back into the Global Action badge before we finished off our Mother's Day gifts. For our next point, we honed in on "empowering women." How do you bring such an adult topic down to a five and six year old's level? Simple! Tell them about famous ladies who were girl scouts, such as our very own Juliette Gordon Low and Anna Maria Chavez. We also mentioned Katie Couric, Venus Williams, Nancy Lopez, Dakota Fanning, Rachel Ray, Sandra Day O'Conner and several others. In case you didn't notice, each of those women has a very different job.
We got so lucky today and had some guest speaker's volunteer to come in. Sadly, two of them had to cancel (a minister and a welder), but we still had one very awesome guest speaker. Our speaker happens to be a teacher to a few of the girls. To set up our guest speaker, we asked the girls what they wanted to do when they grew up, and what they think they had to do to become that. We even tied it in- the teacher would teach the gardener how to plant and care for wheat. The gardener would grow the wheat, harvest it, and sell it to the chef. The chef would make flour out of the wheat and then make bread. The news caster would interview the chef who made the bread, and then bring her all the way back to our teacher. I guess you could call it our own circle of life lesson, but when we put it into action like that, the girls got the two biggest points- you can do anything you want, as long as you stay in school, and of course work hard.
Our speaker was so kind and told the girls what she did to become a teacher. She told the girls about going to college and the classes she took as well as the training she had to take. This interested girls. Most of them thought you went to college, and then you got a job. They really understood better when I told them what I had to do. I'm a chef. I did not sit in a classroom and memorize recipes. I first cooked in a classroom before I had to cook for fellow students. Then I worked in two different kitchen settings (front and back of the house) before I went to another country to practice my skills before graduating. Our teacher had to observe other teachers and practice teaching before she could do it, just like I had to practice cooking before I could do it. Needless to say, our girls thoroughly enjoyed this portion of our badge too (by the way, our cute kiddos gave a vase with flowers to their teacher as a thank you).
We finished off our meeting by throwing in some beans to our vases and placing our flowers in them. After that, we made some invitations to our awards ceremony next week. All in all, it was a fairly low key meeting, but fun. We also got a chance to work parts of the Girl Scout law into what our scouts want to do, ie: being a welder is friendly and helpful and being a gardener makes the world a better place. I can't wait to do this badge next year with new activities, it was so much fun!
These vases were also the perfect opportunity to work in a lesson on being considerate and caring. We read a passage from the guide book and related this to every day life. We talked about simple thing we can do to be considerate and caring, such as using manners and going out of our way to be nice to people. The girls had way better ideas than we did about being considerate and caring. Can I just say, again, these girls are SMART and are going to set the world on fire!
For today's meeting (6), we dove back into the Global Action badge before we finished off our Mother's Day gifts. For our next point, we honed in on "empowering women." How do you bring such an adult topic down to a five and six year old's level? Simple! Tell them about famous ladies who were girl scouts, such as our very own Juliette Gordon Low and Anna Maria Chavez. We also mentioned Katie Couric, Venus Williams, Nancy Lopez, Dakota Fanning, Rachel Ray, Sandra Day O'Conner and several others. In case you didn't notice, each of those women has a very different job.
We got so lucky today and had some guest speaker's volunteer to come in. Sadly, two of them had to cancel (a minister and a welder), but we still had one very awesome guest speaker. Our speaker happens to be a teacher to a few of the girls. To set up our guest speaker, we asked the girls what they wanted to do when they grew up, and what they think they had to do to become that. We even tied it in- the teacher would teach the gardener how to plant and care for wheat. The gardener would grow the wheat, harvest it, and sell it to the chef. The chef would make flour out of the wheat and then make bread. The news caster would interview the chef who made the bread, and then bring her all the way back to our teacher. I guess you could call it our own circle of life lesson, but when we put it into action like that, the girls got the two biggest points- you can do anything you want, as long as you stay in school, and of course work hard.
Our speaker was so kind and told the girls what she did to become a teacher. She told the girls about going to college and the classes she took as well as the training she had to take. This interested girls. Most of them thought you went to college, and then you got a job. They really understood better when I told them what I had to do. I'm a chef. I did not sit in a classroom and memorize recipes. I first cooked in a classroom before I had to cook for fellow students. Then I worked in two different kitchen settings (front and back of the house) before I went to another country to practice my skills before graduating. Our teacher had to observe other teachers and practice teaching before she could do it, just like I had to practice cooking before I could do it. Needless to say, our girls thoroughly enjoyed this portion of our badge too (by the way, our cute kiddos gave a vase with flowers to their teacher as a thank you).
We finished off our meeting by throwing in some beans to our vases and placing our flowers in them. After that, we made some invitations to our awards ceremony next week. All in all, it was a fairly low key meeting, but fun. We also got a chance to work parts of the Girl Scout law into what our scouts want to do, ie: being a welder is friendly and helpful and being a gardener makes the world a better place. I can't wait to do this badge next year with new activities, it was so much fun!
Wednesday, April 11, 2012
Our Kaper chart!
Let me start out by pointing out two things- first, this kaper chart cost me next to nothing. I used supplies I had laying around the house. Of the supplies that I had to buy, I spent less than $5. Second, it did not take very long to make, and was very easy. I hear people look at some of the things I have done and say things like I'm not that crafty. Like I said on my foodie blog, I say your wrong! Sometimes, being crafty means seeing an example of something and turning into your own work of art.
First up, my supplies list:
Poster board
Flower print out
Leaves print out
Clear contact paper (to "laminate" everything)
Markers
Kaper labels
Good turn labels
Clothes pins
Wooden dowel
Hot glue
Duct tape
Flower pot
Rocks (to use as a weight)
Green Easter grass
If you don't have anything of those, here's about how much you might spend:
Poster board, $1 for 2 at the Dollar Tree
Clear contact paper, $5 for 1 roll (you won't even put a dent in it!)
Clothes pins, $1.97 for a pack of 50 at Walmart (you'll have extras)
Wooden dowel, depends on where you go (I think my husband paid $2-$3 for a piece of scrap and didn't use it all)
Flower pot, depends on what you get (the one I got cost $4 a few years ago)
Easter grass, 48 cents per bag at Target (I bought 3 bags, but did not use all 3)
The rest would be miscellaneous items and can really vary in price. However, at least now you have an idea on what it could cost if you need everything. Plus, the extras you can use for other stuff. I bought a fresh roll of contact paper back in August and I've just recently started to make a dent in it (I laminate so many things with it!).
And now, the how to.....
1. Trace or print out your flower. The one I used has 7 petals, and printed it out over two and a half sheets of paper (if I did three, it would not have fit on the poster board), then glued it to my poster board.
My flower outline:

2. Do the same thing for your leaves. Since my flower did not take up 100% of the poster, I had leftover room for my leaves.
My leaves outline:

3. Color and label your chart (or you can print them out, like I did with my mini backup chart). I tried to match mine closely to the Daisy petals. I colored my leaves green and light green to cover those two colors, and used the remaining eight colors on my petals and center. Obviously, royal blue (the "real" center) was left out, but that I covered later on with my dowel by coloring it blue.
My backup kaper chart (which conveniently fits in my folder):
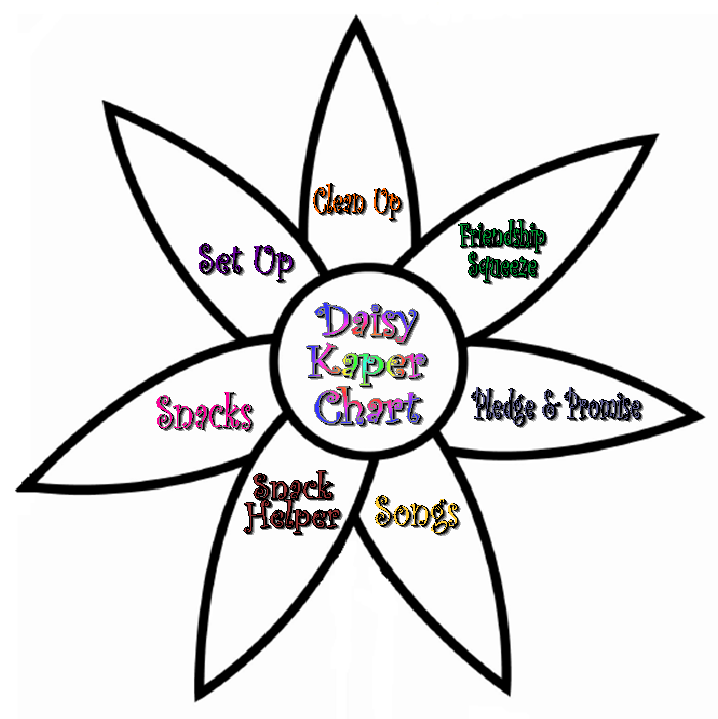 For my back up, I simply printed it out over one sheet of paper, cut it out and laminated it. That way, if I forget my chart or it's raining, or whatever other reason, I will always have that with me.
4. Cut everything out. To laminate it, simply measure it out over your contact paper. If yours is the same size as mine, it should fit perfectly (you'll have to do a little twisting and turning, but it will fit. If it doesn't, later on you can use scraps to cover any small spots). Cut out your 2 pieces (one front, one back). Carefully remove the back and lay it flat so you can put your flower on it. I recommend putting the backside down first- the back doesn't have to be perfect, so this makes it easier to get the front looking good. Repeat the process for the front side, but when you lay your top layer down, be careful as you lay it to avoid air bubbles (but those can easily be smoothed out later). Once it is laminated, you'll need to cut off the excess. Do not cut right up to your leaf, leave a little excess laminate to keep it "sealed." Repeat this for your leaves.
5. Once you have your flowers and leaves done, you'll want to glue or tape them to your dowel. I did both. I hot glued them, and reinforced them on their backsides with some duct tape. Do not be afraid of the duct tape, it is your friend. As for affixing the dowel to your pot, that depends on the type of materials your dowel and pot are (wood, plastic, terra cotta, ect.). I had a wooden dowel and plastic pot. I hot glued the dowel to the pot, put excess glue around the base when the initial glued had hardened, and then reinforced that with more duct tape.
6. For the pot, you'll want to put something at the bottom to keep it weighted. I used rocks. I laid them in the bottom and put a loose layer of hot glue, just to keep them in place. I topped that with my Easter grass to finish it off.

Ok, so maybe it is a little bulky, but it's fun! For Daisy aged scouts, something like this is easy for them to see and pay attention to. They'll always know to check it when they come in too. On my kaper chart, I have one of my leaves listed as "good turn." Each week, I can pin up our good turn for the week on it. That way, we'll never forget!
First up, my supplies list:
Poster board
Flower print out
Leaves print out
Clear contact paper (to "laminate" everything)
Markers
Kaper labels
Good turn labels
Clothes pins
Wooden dowel
Hot glue
Duct tape
Flower pot
Rocks (to use as a weight)
Green Easter grass
If you don't have anything of those, here's about how much you might spend:
Poster board, $1 for 2 at the Dollar Tree
Clear contact paper, $5 for 1 roll (you won't even put a dent in it!)
Clothes pins, $1.97 for a pack of 50 at Walmart (you'll have extras)
Wooden dowel, depends on where you go (I think my husband paid $2-$3 for a piece of scrap and didn't use it all)
Flower pot, depends on what you get (the one I got cost $4 a few years ago)
Easter grass, 48 cents per bag at Target (I bought 3 bags, but did not use all 3)
The rest would be miscellaneous items and can really vary in price. However, at least now you have an idea on what it could cost if you need everything. Plus, the extras you can use for other stuff. I bought a fresh roll of contact paper back in August and I've just recently started to make a dent in it (I laminate so many things with it!).
And now, the how to.....
1. Trace or print out your flower. The one I used has 7 petals, and printed it out over two and a half sheets of paper (if I did three, it would not have fit on the poster board), then glued it to my poster board.
My flower outline:
2. Do the same thing for your leaves. Since my flower did not take up 100% of the poster, I had leftover room for my leaves.
My leaves outline:
3. Color and label your chart (or you can print them out, like I did with my mini backup chart). I tried to match mine closely to the Daisy petals. I colored my leaves green and light green to cover those two colors, and used the remaining eight colors on my petals and center. Obviously, royal blue (the "real" center) was left out, but that I covered later on with my dowel by coloring it blue.
My backup kaper chart (which conveniently fits in my folder):
4. Cut everything out. To laminate it, simply measure it out over your contact paper. If yours is the same size as mine, it should fit perfectly (you'll have to do a little twisting and turning, but it will fit. If it doesn't, later on you can use scraps to cover any small spots). Cut out your 2 pieces (one front, one back). Carefully remove the back and lay it flat so you can put your flower on it. I recommend putting the backside down first- the back doesn't have to be perfect, so this makes it easier to get the front looking good. Repeat the process for the front side, but when you lay your top layer down, be careful as you lay it to avoid air bubbles (but those can easily be smoothed out later). Once it is laminated, you'll need to cut off the excess. Do not cut right up to your leaf, leave a little excess laminate to keep it "sealed." Repeat this for your leaves.
5. Once you have your flowers and leaves done, you'll want to glue or tape them to your dowel. I did both. I hot glued them, and reinforced them on their backsides with some duct tape. Do not be afraid of the duct tape, it is your friend. As for affixing the dowel to your pot, that depends on the type of materials your dowel and pot are (wood, plastic, terra cotta, ect.). I had a wooden dowel and plastic pot. I hot glued the dowel to the pot, put excess glue around the base when the initial glued had hardened, and then reinforced that with more duct tape.
6. For the pot, you'll want to put something at the bottom to keep it weighted. I used rocks. I laid them in the bottom and put a loose layer of hot glue, just to keep them in place. I topped that with my Easter grass to finish it off.

Ok, so maybe it is a little bulky, but it's fun! For Daisy aged scouts, something like this is easy for them to see and pay attention to. They'll always know to check it when they come in too. On my kaper chart, I have one of my leaves listed as "good turn." Each week, I can pin up our good turn for the week on it. That way, we'll never forget!
Monday, April 2, 2012
A New Kaper Chart
With my new troop about to start up, I'm in need of a new kaper chart. Like most things on the web, I have seen so many cute and wonderful ideas to base our new one on!
For those of you who don't know what a kaper chart is- it's like a task/chore assignment board. It has things on it like who's helping pass out papers, picking out the song of the day, helping collect things, ect. Like all cute things I find, I just have to figure out which way I want to go!
Example 1 Uses a big daisy. Each petal has an assignment. The girls names are listed on some cute butterflies that can be placed where need be for each meeting.
Example 2 Is pictured towards the bottom of this page. It's simple, but very easy. The chart uses a tri-fold board and the paper dolls from Making Friends. It has slots to put the dolls in with its kapers.
Example 3 Is similar to the above, but instead of plain slots, it uses cute sleeping bags to spruce up the slots.
Example 4 Is listed a miniature example, but can be done in "full" size. It has the kapers listed along the side with girls names on clothes pins.
Example 5 Is an awesome example from the wonderful Crafster site. This one uses the actual Daisy petals and also has its girls listed on cute butterflies.
Example 6 Is more of a straightforward idea, which might be better for older girls.
Example 7 I think is absolutely perfect as far as listing kapers geared towards Daisies. It's also cute!
With Daisy aged scouts, you don't want hard assignments, but you do want to instill a sense of responsibility in them by using the kaper chart. In a way, it covers "responsible for what I say and do" for the whole year. Most of the Daisy themed charts above list things like take attendance, snacks helper, lead the pledge, help with clean up, help with specific tasks, and more. Every troop is different, so it's a matter of figuring out what works best for your troop. I personally do not advise using a kaper chart during your first meeting, unless you have an established troop. Especially with this age scout, you need to have your first meeting (or even two) just to get a feel for what they are like, so you can make the proper kaper chart. Before hand, you can at least do the basics to put it together, but hold off on the assignments.
As for what I'm thinking about doing for mine, something that looks like an actual daisy garden. I found a cute project to display fake flowers, but also noticed in the tiny thumb nail, the flowers had writing on it (it had something to do with a bible passage, and unfortunately I couldn't make out the rest). Knowing that we'll be doing the journey Welcome to the Daisy Flower Garden, it seems like the perfect way for us to go this year.
The good news, my husband, like me, keeps scraps. I went through his scraps pile in the garage and found several things I can use to make this. I went through my own stuff and pulled out things to use for my project as well. It's going to take some fiddling, but hopefully come this weekend, I will have something new to show you all!
As for what I'm thinking about doing for mine, something that looks like an actual daisy garden. I found a cute project to display fake flowers, but also noticed in the tiny thumb nail, the flowers had writing on it (it had something to do with a bible passage, and unfortunately I couldn't make out the rest). Knowing that we'll be doing the journey Welcome to the Daisy Flower Garden, it seems like the perfect way for us to go this year.
The good news, my husband, like me, keeps scraps. I went through his scraps pile in the garage and found several things I can use to make this. I went through my own stuff and pulled out things to use for my project as well. It's going to take some fiddling, but hopefully come this weekend, I will have something new to show you all!
Wednesday, March 21, 2012
Spring Prep, redux
With a newly formed troop, I have had to re-shift my focus on planning out our spring schedule. I have a bit of a hidden agenda though. Not that long ago, I found out that I would be attending the Girl's World Forum this summer that will be tackling the eight Millennium Development Goals in Girl Scouting. If you take a look at the eight goals and the UN's reports on their status, you'll see that it's some pretty serious stuff. However, the MDG's also play into a special badge, the Global Action Awareness badge. The best part, if you take a look on the Girl Scout website, you'll see that it has steps on how to earn this badge for every level, including for Daisies. It gets better- most of these tie right in with the Daisy petals.
We have a lot of new girls coming into the troop, so we're kind of starting over. We do have a few who have been in since the fall, so this obviously is not new to them. Meeting one will be an introduction for the new girls. Meeting two will be a good refresher for our "old" girls since we plan on making a collage about the GS promise and law (I might regret later on letting them use modge podge and tissue paper!).
Meeting three is when we will finally dive into the MDG's and Global Awareness badge. We're going to learn about environmental stability and recycling, which falls right into saving the planet and end hunger and poverty. Now you ask, how?? Simple! We're planting mini-gardens in recycled cans. Before you do this, make sure you have metal cutting scissors (I'll post a how to with photos later).
That is being followed up with a lesson in one of the financial literacy leaves and a trip to a local farmer's market. This then plays into meeting four, which is more about the two above MDG's and plays a little into helping children survive. We're going to cook with what the girls buy at the farmer's market, since obviously our gardens won't be ready in a week. This will also be a good healthy eating lesson, and plays into all the MDG's which relate to nutrition, survival and education.
The next few meetings are along the same lines- tie in an MDG and portion of the Global Action Awareness badge in with a Daisy petal, and keep up with using as many recycled materials as possible (I'm trying to find something else to do with those toilet paper rolls). We probably won't get in all 10 points by the end of the school year, but we might meet a few times over the summer, and it's easy enough to finish this up in the fall. We're still planning on resuming our journeys in the fall and continuing work on the petals.
Mixed in with all that will be an attempt at some fun time. We're hoping that our last meeting of the school year can be something fun like an indoor camp fire (not real obviously). It's been a while since I made a faux fire, so I think I need to hop in Pintrest to research the easier/cheaper ones before I destroy my crafts stash. However, next up on the list is inventorying the craft room again to see what all I have.
We have a lot of new girls coming into the troop, so we're kind of starting over. We do have a few who have been in since the fall, so this obviously is not new to them. Meeting one will be an introduction for the new girls. Meeting two will be a good refresher for our "old" girls since we plan on making a collage about the GS promise and law (I might regret later on letting them use modge podge and tissue paper!).
Meeting three is when we will finally dive into the MDG's and Global Awareness badge. We're going to learn about environmental stability and recycling, which falls right into saving the planet and end hunger and poverty. Now you ask, how?? Simple! We're planting mini-gardens in recycled cans. Before you do this, make sure you have metal cutting scissors (I'll post a how to with photos later).
That is being followed up with a lesson in one of the financial literacy leaves and a trip to a local farmer's market. This then plays into meeting four, which is more about the two above MDG's and plays a little into helping children survive. We're going to cook with what the girls buy at the farmer's market, since obviously our gardens won't be ready in a week. This will also be a good healthy eating lesson, and plays into all the MDG's which relate to nutrition, survival and education.
The next few meetings are along the same lines- tie in an MDG and portion of the Global Action Awareness badge in with a Daisy petal, and keep up with using as many recycled materials as possible (I'm trying to find something else to do with those toilet paper rolls). We probably won't get in all 10 points by the end of the school year, but we might meet a few times over the summer, and it's easy enough to finish this up in the fall. We're still planning on resuming our journeys in the fall and continuing work on the petals.
Mixed in with all that will be an attempt at some fun time. We're hoping that our last meeting of the school year can be something fun like an indoor camp fire (not real obviously). It's been a while since I made a faux fire, so I think I need to hop in Pintrest to research the easier/cheaper ones before I destroy my crafts stash. However, next up on the list is inventorying the craft room again to see what all I have.
Tuesday, March 13, 2012
Next Year's prep, take 2!
For those of you who follow this blog, I'm sure all of you have figured out by now that I have a very "type A" personality. It can be annoying to some, but when it comes to planning out things for kids, it has its benefits. After re-reading my list of "challenges," I got to work!
My eighth challenge that I listed was finding a new co-leader, as our troop will be splitting up after our first graders bridge this year. That challenge, thankfully, I have completed. The best part, it's a friend who's daughter will be one of our new Daisy's next year. I've known her for almost six years now, and I am so thankful that she will be my new co-leader!
My first challenge that I tasked myself with was coming up with activities for the petals next year that are different than this year's. So far, I have the SWAP project and Flat Juliette to start us out. Also to work with will be our two journeys, Welcome to the Daisy Flower Garden, and Between the Earth an Sky. Meeting two, we plan on diving right into the petal "be a sister to every Girl Scout," by knocking out our SWAPs. Meeting three we plan on diving into Welcome to the Daisy Flower Garden. This seems like the perfect way to start out the year, as this book truly introduces the girls to Girl Scouting. That also leads us into our fourth meeting. Our fourth meeting, tentatively, will involve planting a garden at the school we meet at. We're working on getting our materials donated for this project. No decision has been made yet, so fingers crossed! The next few meetings we're still working on, however, we did come up with a terrific idea on what to do for Founder's Day. While looking through some of the free books Kindle has to offer, I stumbled upon the Girl Scout handbook from 1925. That gave us the idea to come up with a way to earn a badge from this handbook or any other "old" handbook.
Challenge number ten obviously goes hand in hand with our meeting plans. It has been trying to work this in, but we're getting it, slowly. The Discover portion seems to be easy for the Daisy aged girls. Planting and caring for a garden is one of the many ways they can discover. Connect has been presenting us with a small challenge, but as we look closer into Between the Earth and Sky, we have realized that this journey is perfect for this. Take Action is iffy right now. There are portions that we are able to incorporate here and there, but others we're trying to figure out how to show this to our girls. More importantly, trying to incorporate the leadership skills for this age of scouts is difficult. Luckily, we have all summer to work on challenger ten.
Backing up to challenge seven, that SWAP project. Somehow, with very little effort, it's managed to work itself out. I do have a partner in crime, and she has been wonderful (I know you read my blog Heather, so again, thanks for your help, it is invaluable!!!). We're slowly getting more people who are interested. We do have some international troops who want to participate, and that is completely awesome, on so many levels! I am so looking forward to kicking this off next year. My new Co and I have a few cute, and cheap ideas we're looking into for our SWAP. This past weekend, at the Centennial Bridging and Sunrise Ceremony, my daughter collected quite a few cute SWAPs that have given me lots of new ideas. I think this week I will sit down and look at them.
Looking at challenge two again, working in our journey books, has obviously provided us with a lot of good material. As I said before, Welcome to the Daisy Flower Garden is absolutely perfect as an introduction to scouting. After reading the book and the accompanying leaders guide, I felt like I had very little work to do. The leaders guide was an excellent compass for planning out our meetings. At this very moment, I have not finished reading Between the Earth and Sky, as I had to exchange it for a working copy (my original copy was printed upside down and backwards, but thankfully I was able to exchange it for a good copy). In what I did read so far, I have picked up on two themes- travelling and feelings. A good friend of mine was telling me a little about the journey she's doing with her junior troop. They've been doing a bit with feelings, and have created a safe space within their meetings by having a "secret clubhouse." Knowing that we're going to touch on this, with our second journey, I realized that it would be imperative for us to create a similar safe place. This is something we'll have to get into later.
Ok, so what exactly have I been babbling about this whole time, and will do in another post? Preparedness. This amazing article sums most of it up. It is important to prepare ahead of time to make sure that your troop is getting everything they can out of scouting, and to keep everything together in an orderly fashion.
And now, for my next set of challenges, starting up a new troop sooner, rather than later.... as in next month. Fingers crossed!
Ok, so what exactly have I been babbling about this whole time, and will do in another post? Preparedness. This amazing article sums most of it up. It is important to prepare ahead of time to make sure that your troop is getting everything they can out of scouting, and to keep everything together in an orderly fashion.
And now, for my next set of challenges, starting up a new troop sooner, rather than later.... as in next month. Fingers crossed!
Tuesday, February 14, 2012
Next Year's prep, take 1!
As you already know, I've put Flat Juliette into the works as a tool for our first meeting next year. That's only one meeting, which leaves me with a LOT of work left to do. This year we worked out of 5 Flowers, 4 Stories, 3 Cheers For Animals! And the Daisy Guide book. Our Daisy troop next year will have a lot of new girls since most of this year's troop are bridging to Brownies. I have a lot of things to keep in mind!
Challenge number 1- attempting to plan activities around the petals, but ones that are different from this year's activities
Challenge number 2- incorporating in the journey books Welcome to the Daisy Flower Garden and Between the Earth and Sky
Challenge number 3- planning new/different field trips
Challenge number 4- keeping our budget as low as possible by incorporating more recycled crafts into our meeting plans
Challenge number 5- collecting donations of said recycled materials
Challenge number 6- considering a "journey day" where our new Daisies can have the opportunity to work on 5 Flowers, 4 Stories, 3 Cheers For Animals! Which in turn will earn them the Journey Summit pin
Challenge number 7- organizing a massive SWAP project
Challenge number 8- finding a new co-leader
Challenge number 9- planning projects that can turn into future projects (ie: turning the SWAP project in to pen pals, and turning a school flower garden into an on going thing)
Challenge number 10- incorporating more of the new Girl Scout mantras into our "lesson" planning
It's a lot to digest and comprehend, especially when dealing with a bunch of 6 year olds! Thankfully, I have plenty of time to work on this.
Challenge number 8- finding a new co-leader
Challenge number 9- planning projects that can turn into future projects (ie: turning the SWAP project in to pen pals, and turning a school flower garden into an on going thing)
Challenge number 10- incorporating more of the new Girl Scout mantras into our "lesson" planning
It's a lot to digest and comprehend, especially when dealing with a bunch of 6 year olds! Thankfully, I have plenty of time to work on this.
Friday, February 3, 2012
Thinking Day Prep!
Our service unit does a big "fair" for Thinking Day. It's really something else. All of the troops are assigned a country and get to do a display/booth about it. We were assigned Greece.

During meeting 13, we tried a variety of foods that we planned out. We strategically placed some of those Greek foods in there so that the girls could choose what we would make for it. In the end, they choose the souvlaki. So for our food tasting, we will have the souvlaki with tsaziki and baklava at our table.
The next part to Thinking Day will be the passports. When each girl arrives, they will be given a passport to collect stamps at each booth. Let me just tell you now how hard it is to find a Greek stamp! The closest I could find was a set of travel stamps that had the Parthenon on it, but I was not about to spend $30 on the set of 8! Thankfully, Cricut had a sale directly on their website. They had several cartridges that were perfect! The Destinations cartridge was one of them, and at the time, I was able to snag it for $20. The cartridge has SO many locations on it, and is something I can use for future Thinking Days. We printed out their Parthenon with one of the labels that said Greece, and mounted it like a sticker to use for the passports.
Next up was the SWAPS. If you have never been to the site Making Friends, then you don't know what you are missing! It is scout central and SO much more. They had several great ideas on what we could do for our SWAPS, including print outs for miniature post cards! One piece of advice- before you buy anything from their site, price shop. We found a few things that Hobby Lobby had for cheaper, but other thing that Making Friends price just could not be beat. We shopped around got our pins and beads from various spots.
The next step is the costumes. We are not required to wear costumes, but we are required to have at least two girls in costume to represent our troop in the parade of countries. I was honestly overwhelmed when I did research on what we could do for costumes. There was the obvious, a toga, which can easily be done with an old sheet. The next thing that popped into my head was the Balkan Dancers (though at first I could not remember what they were called, so I Googled "Greek dancers"). It's easy to do a simple version of that costume- peasant shirt (or white, long sleeved shirt), red vest, black skirt, and some of those cute socks that make your legs looked like their laced up (which most little girls LOVE), or something similar, along the same lines (just look up the photos, the costumes vary, but have the same basis). I thought that we should give them one more option, just in case, and the thing that kept coming back to my mind was the Olympics. After all, Greece is the birthplace of the Olympics. I'm not talking about Spartacus era costumes though, I'm thinking more along the lines of sports. Not everyone is about to run out and get an equestrian outfit or wet suit, so for our kids, it was easier to give them the option of dressing up like someone from their favorite sport. Some of them already have soccer and softball uniforms, so it's very easy for them.
Our next component is our display, which we will be working with our girls on. There's a lot of information to put out on Greece as you can see from all of the above. They will be narrowing it down during our meeting. By letting them pick and choose what to put on display, it will give them a chance to learn more about Greece.
The last component to our preparations will be the paper dolls. Along with the passports, each girl will be receiving paper dolls. We are then supposed to provide some sort of an outfit that represents our country. Making Friends has a lot of outfits, but nothing that we can truly use to represent Greece (that might make sense to most of the girls there). They do have a few sporty outfits, but once they take those home, I feared that they might not make that connection. I printed out one of the dolls and a few outfits and drew up our own toga for the dolls.
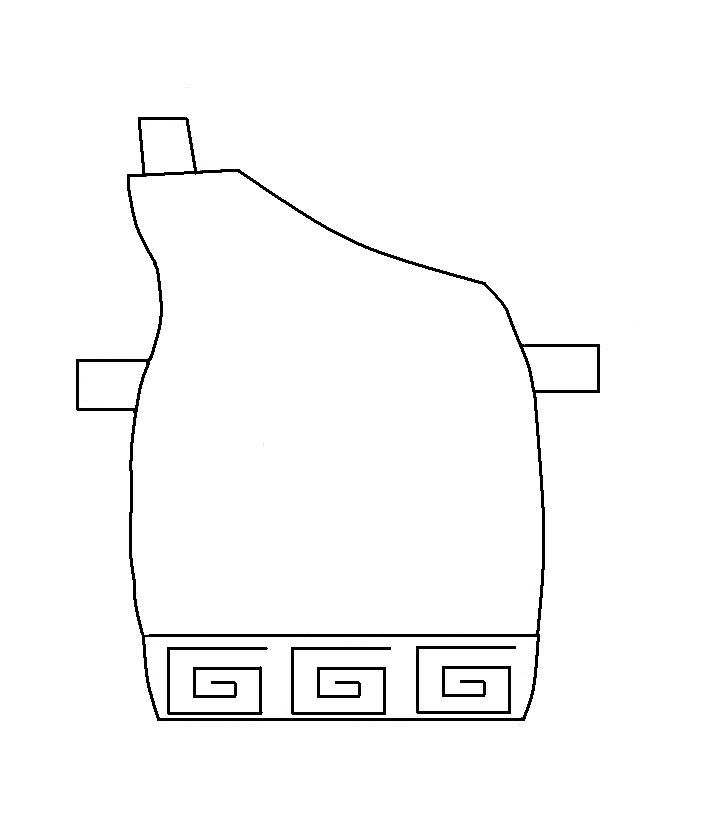
After everything I have printed out, I am almost certain the printer and my Cricut hate me right now, so they will be getting a much needed break for a few weeks.
Next up was the SWAPS. If you have never been to the site Making Friends, then you don't know what you are missing! It is scout central and SO much more. They had several great ideas on what we could do for our SWAPS, including print outs for miniature post cards! One piece of advice- before you buy anything from their site, price shop. We found a few things that Hobby Lobby had for cheaper, but other thing that Making Friends price just could not be beat. We shopped around got our pins and beads from various spots.
The next step is the costumes. We are not required to wear costumes, but we are required to have at least two girls in costume to represent our troop in the parade of countries. I was honestly overwhelmed when I did research on what we could do for costumes. There was the obvious, a toga, which can easily be done with an old sheet. The next thing that popped into my head was the Balkan Dancers (though at first I could not remember what they were called, so I Googled "Greek dancers"). It's easy to do a simple version of that costume- peasant shirt (or white, long sleeved shirt), red vest, black skirt, and some of those cute socks that make your legs looked like their laced up (which most little girls LOVE), or something similar, along the same lines (just look up the photos, the costumes vary, but have the same basis). I thought that we should give them one more option, just in case, and the thing that kept coming back to my mind was the Olympics. After all, Greece is the birthplace of the Olympics. I'm not talking about Spartacus era costumes though, I'm thinking more along the lines of sports. Not everyone is about to run out and get an equestrian outfit or wet suit, so for our kids, it was easier to give them the option of dressing up like someone from their favorite sport. Some of them already have soccer and softball uniforms, so it's very easy for them.
Our next component is our display, which we will be working with our girls on. There's a lot of information to put out on Greece as you can see from all of the above. They will be narrowing it down during our meeting. By letting them pick and choose what to put on display, it will give them a chance to learn more about Greece.
The last component to our preparations will be the paper dolls. Along with the passports, each girl will be receiving paper dolls. We are then supposed to provide some sort of an outfit that represents our country. Making Friends has a lot of outfits, but nothing that we can truly use to represent Greece (that might make sense to most of the girls there). They do have a few sporty outfits, but once they take those home, I feared that they might not make that connection. I printed out one of the dolls and a few outfits and drew up our own toga for the dolls.
It's a little rough, but it fits the doll, and unlike many of the other print outs, it has those handy dandy tabs that most paper doll clothing has.
After everything I have printed out, I am almost certain the printer and my Cricut hate me right now, so they will be getting a much needed break for a few weeks.
Sunday, December 18, 2011
Meeting Thirteen Prep
Call me a nerd if you want, but I think meeting thirteen is going to be my favorite meeting of the whole year. There's an awesome lesson suggestion in the leader's book of 5 Flowers, 4 Stories, 3 Cheers for Anmials! That does taste testing, and there's a wonderful passage in the girls book that goes with it. After reading it, I geeked out!
The challenge for us is that we do have a few food allergies in our troop, but thankfully, not many and they are minor allergies. So, for us, no blueberries and we have to go easy on the milk and cheese. Our other concern was thinking day. Our Service Unit is having a big festival for the thinking day, and our troop will be in charge of doing a booth for Greece. We decided to work in some Greek food for the girls to try. For our menu we decided on:
Pork Gyro with whole grain pita and mosca style tomatoes
Chicken Souvlaki with pita
Tzasiki (for Gyro and Souvlaki)
Hummus
Chorizo Empanada
Zucchini and Apricot spice cake/bars
Japanese Ramune soda
Reading that, it sounds like a LOT of cooking, but with both us working on it, it really wasn't that bad. Granted, for me, this was nothing but another day in the kitchen. My husband, on the other hand, almost made this impossible since he was standing over us the entire time wanting to "perform quality assurance testing." We caved and gave him an Empanada and that kept him happy, until he finished it and wanted more. BUT, we got it done, so now to see how the girls like it!
The challenge for us is that we do have a few food allergies in our troop, but thankfully, not many and they are minor allergies. So, for us, no blueberries and we have to go easy on the milk and cheese. Our other concern was thinking day. Our Service Unit is having a big festival for the thinking day, and our troop will be in charge of doing a booth for Greece. We decided to work in some Greek food for the girls to try. For our menu we decided on:
Pork Gyro with whole grain pita and mosca style tomatoes
Chicken Souvlaki with pita
Tzasiki (for Gyro and Souvlaki)
Hummus
Chorizo Empanada
Zucchini and Apricot spice cake/bars
Japanese Ramune soda
Reading that, it sounds like a LOT of cooking, but with both us working on it, it really wasn't that bad. Granted, for me, this was nothing but another day in the kitchen. My husband, on the other hand, almost made this impossible since he was standing over us the entire time wanting to "perform quality assurance testing." We caved and gave him an Empanada and that kept him happy, until he finished it and wanted more. BUT, we got it done, so now to see how the girls like it!
Meeting Twelve Prep
I'm not sure if this is going to be a hit yet, but we'll see. For meeting twelve, we'll be making classic popsicle stick birdhouses. Thankfully, one of our awesome parents donated a giant box of popsicle sticks, so if the girls have trouble, we'll have extras, and lots of them.
The last time I made one of these, I was in elementary school, so I had to do some research on this, and find a way to do this without having to buy more sticks (granted, we have 1,000 sticks, so we should be ok). Some versions have you using dozens of sticks to make large houses. We also won't have to time to make those, so we needed to find something smaller, more practical, and easy enough for our Daisies to do. I can honestly say that for the first time ever, a search on Pintrest did not help, so on to Google I went! And oh the horrors I found! I mean, a house that needs 800 sticks, one that needs sticks, pine cones and hot glue, another one that needed a milk carton to glue the sticks onto and I even found one project that used tongue depressors to make a castle. I mean, really? Who has time to do that? Around page 12, I found a poem about birdhouses. It was about that time that I wanted to bang my head against the wall and wished that I could remember how we did in art class all those years ago. By the time I hit page 22, I was running into to sites that were selling kits to make birdhouses. I even found a book on making "creative" birdhouses. But, thanks to a clever little article on Ehow, it hit me- log cabin style.
The principle is fairly simple. Make a base by lining up several popsicle sticks (enough to cover the length of one) and then use a popsicle stick on either end to hold/glue the ends together. From there, stack it like you would a log cabin, gluing at the corners. To make this easier, we got out some foam sheets we had left over from another project and cut them into square so the girls could use them for the bases. We also used the excess foam to make roofs for the houses. I made one to show them how, but figure like mot projects, it's best to just show them, and then let them do the rest.
The last time I made one of these, I was in elementary school, so I had to do some research on this, and find a way to do this without having to buy more sticks (granted, we have 1,000 sticks, so we should be ok). Some versions have you using dozens of sticks to make large houses. We also won't have to time to make those, so we needed to find something smaller, more practical, and easy enough for our Daisies to do. I can honestly say that for the first time ever, a search on Pintrest did not help, so on to Google I went! And oh the horrors I found! I mean, a house that needs 800 sticks, one that needs sticks, pine cones and hot glue, another one that needed a milk carton to glue the sticks onto and I even found one project that used tongue depressors to make a castle. I mean, really? Who has time to do that? Around page 12, I found a poem about birdhouses. It was about that time that I wanted to bang my head against the wall and wished that I could remember how we did in art class all those years ago. By the time I hit page 22, I was running into to sites that were selling kits to make birdhouses. I even found a book on making "creative" birdhouses. But, thanks to a clever little article on Ehow, it hit me- log cabin style.
The principle is fairly simple. Make a base by lining up several popsicle sticks (enough to cover the length of one) and then use a popsicle stick on either end to hold/glue the ends together. From there, stack it like you would a log cabin, gluing at the corners. To make this easier, we got out some foam sheets we had left over from another project and cut them into square so the girls could use them for the bases. We also used the excess foam to make roofs for the houses. I made one to show them how, but figure like mot projects, it's best to just show them, and then let them do the rest.
Sunday, November 6, 2011
Meeting Ten Prep
Meeting ten will be taking place just before Thanksgiving. There's so many Thanksgiving crafts to do, but the question for us was which one can we tailor towards our girls and Girl Scouting? We started looking at all of the ideas out there and fell in love with a picture of some turkeys made out of construction paper and had made an accordion fold with the legs. That's when it his us- give the turkey the ten daisy petals instead of a few generic petals. Plus, with our girls still trying to remember the lines to the law, it was another chance to work it
in!
To help them out, we made an outline for the turkey that we printed out on brown construction paper:

After that, we picked out the other colors they would need from out construction paper stash. It's really not a complicated craft, but it ties in the holiday and scouting.

To help them out, we made an outline for the turkey that we printed out on brown construction paper:
After that, we picked out the other colors they would need from out construction paper stash. It's really not a complicated craft, but it ties in the holiday and scouting.
Meeting Eleven Prep
Meeting eleven will be all about turtles. Our fearless leader's original idea was to have the girls make turtles out of papier mache, but I brought up the question of where will they dry? There's an activity from the leader book that has the girls coloring a turtle shell, but that won't last them very long. Obviously, we needed something else to do. While at Michael's a few weeks ago, we stumbled into the isle that had foam and foam crafts. I had bought some kits for my daughter that created cute animals using little foam dots. I found them and showed them to our fearless leader. That was when we saw the boxes of turtles and realized that it would be something easy and mess free for the girls to do. And, the best part, each kit only cost $1!!! I think it's safe to say that the prep for this meeting was incredibly easy!

Meeting Eight Prep
For meeting eight, we will be getting very brave and will be making pine cone bird feeders. It's something perfect that goes along with our animal theme from 5 Flowers, 4 Stories, 3 Cheers For Animals! And along with our "recycled items" motif. Not only that, there are few supplies we have to buy for this meeting.
Meeting prep:
Open pine cones (we got 30, thinking each girl could make 2)
Peanut butter (with 15 girls, and 2 pine cones each, we got 3 large jars)
10 lb bag of bird seed (yes, this is too much, but we will have another use for it later)
Paper plates
Plastic spoons
String or yarn
If you've never made one, here's how to do it- simply spread the peanut butter around the pine cone, and then roll the pine cone around in the bird seed. Tie a piece of string to it, and then hang from something outside.
Meeting prep:
Open pine cones (we got 30, thinking each girl could make 2)
Peanut butter (with 15 girls, and 2 pine cones each, we got 3 large jars)
10 lb bag of bird seed (yes, this is too much, but we will have another use for it later)
Paper plates
Plastic spoons
String or yarn
If you've never made one, here's how to do it- simply spread the peanut butter around the pine cone, and then roll the pine cone around in the bird seed. Tie a piece of string to it, and then hang from something outside.
Thursday, October 6, 2011
Investiture and Rededication prep
Raise your hand if it feels like our little girls were just babies!!! Ok, it's nice to know I'm not the only one with my hand up. Our fearless leader and I started planning our investiture and rededication ceremony the other night. We have a few girls who were Daisies last year, but most of them are new. We did the generic Google search for Girl Scout ceremonies and got a lot of good material to work with. The short version, we took pieces from a few ceremonies we found and smooshed it all together into one big happy thing.
First site we looked into was this one. We thought it was a good jumping point, and we knew we liked the idea of having each girl being able to say something. That lead us to this gem. We took the second part and put that into our ceremony. After that, we started looking for something that we could do to involve candles. Our fearless leader thought it might be a really nice touch (and I agree!). While searching, we stumbled upon (literally, used Stumbleupon) various candle ceremonies and got an idea for what we wanted to put in there.
In the mean time, we worked out the rest of the kinks for the ceremony. Seeing as how each girl will have a line, we made index cards. Each card had the girl's line on it, as well as who she would follow. The lines are short, and very easy. Some of the lines, as you can see from the ceremony above, are representative of the GS law. Next up, was making the board we would be using for the petals. Now comes the fun....
What you will need:
2 poster boards (1 can be in green)
1 roll of velcro, with sticky backing
hot glue gun
glue stick or a bottle of glue
scissors
1 cut out in each of the Daisy colors- blue, light blue, yellow, spring (light) green, red, orange, purple, magenta, green, rose, violet

For the full photo, head over here
2 short candles
1 tall candle, wrapped in yellow ribbon (or already yellow)
For the petals:
Step 1: Print out the petals over 4 sheets of paper (to do this, I used the program Print Shop, which allows you to "blow up" posters)
Step 2: Put together your 4-page "poster" of the petals over a poster board (to give it a "solid" backing)
Step 3: Begin to cut out your petals, but do not cut all the way (this allows you to properly line then up
Step 4: Place your velcro over each petal and the center
Step 5: Place the petals on your green poster board
Step 6: Finish cutting out your petals
Step 7: Using small post its, label each petal (so the girls know where to place it)
Ok, so maybe that was a little bit of overkill, but I'm a bit of a perfectionist (or as my husband puts it, slightly neurotic). In addition to the lines on the note cards, we also wrote which petal each girl will have to place, and who they will speak after. As you will see from our program below, not every girl has a petal to place, but it ended up working out to our benefit. Most of our troop is comprised of first graders, but we have a few kindergartners mixed in. We gave those girls the short lines that had no petals to place (we tried to make it easier on them). It killed me a little because those girls are super smart, but we had to be fair all around.
Obviously, the girls who are rededicating, will not be receiving their pins this year (since they got them last year). We didn't want to leave them out though, so I had a nifty little idea. I love working with Fimo (polymer clay), so I decided to make them some cute pins that we could give them (a "fun" pin). Now, onto the fun stuff!
Ceremony
Girls will line up and walk in, then line up at designated spot
ALL: Pledge of Allegiance
Leader: Welcome and thank you everyone for coming out tonight for troop {troop #}’s Investiture and Rededication ceremony. I’m {leader name}, and this is my Co-leader {co-leader name}.
Co-leader: Tonight we will be inducting our new girl scouts and welcoming back our returning girl scouts. We’d like to start out with one of the songs we start our meetings out with.
Opening song, I’m a Little Daisy
Petal Ceremony.....
Leader: Troop {#}, you are about to become Daisy Girl Scouts. Together we will
explore all the fun and adventures of Girl Scouting. Do you know about scouting?
Girl 1: The founder of Girl Scouts was named Juliette Gordon Low.
Girl 2: Her nickname was "Daisy".
Girl 3: We are named after her.
Girl 4: Together we will learn more about Girl Scouting.
Girl 5: The Girl Scout Promise is the pledge that tells us how to be good citizens and scouts.
(Place the blue Promise Center in center of felt board.)
Co-leader: In Daisy Girl Scouts, the girls will earn the 10 Learning Petals. Each petal is a different color, which represents a different phrase from the Girl Scout Law.
ALL: I will do my best to:
Girl 6: (place light blue petal on felt board)
Be honest and fair
Girl 7: (place yellow petal on felt board)
Be friendly and helpful
Girl 8: (place spring green petal on felt board)
Be considerate and caring
Girl 9: (place red petal on felt board)
Be courageous and strong
Girl 10: (place orange petal on felt board)
Be responsible for what I say and do
Girl 11: (place purple petal on felt board)
Respect myself and others
Girl 12: (place magenta petal on felt board)
Respect authority
Girl 13: (place green petal on felt board)
Use resources wisely
Girl 14: (place rose petal on felt board)
Make the world a better place
Girl 15: (place violet petal on felt board)
Be a sister to every Girl Scout.
ALL: Raise right hands and recite the Girl Scout Promise
On my honor, I will try:
To serve God and my country
And to live by the Girl Scout Law!
Pinning Ceremony
Leader: Each living thing begins as a small ray of light, of hope. The seed needs to be nurtured in order to grow. In Girl Scouts, these rays of hope are the girls of the world. Each seed is planted with love. The value of each young girl is recognized by older people-parents, siblings, friends, neighbors, leaders, and community members. Our Daisies have been nurtured in their homes and in their community. They are now ready to bloom!
Co-leader: Troop {#}'s Daisy meetings will be a place where each girl's individuality is valued. It will be a place where the importance of caring for ourselves and others will be emphasized. We will learn about our world and ways to care for nature. We will have fun! Our troop will be a place for each girl to live the new Girl Scout motto, "Girl Scouts. Where Girls Grow Strong!" We are here to greet the newest buds in the Girl Scout world. It is time for our new Daisies to emerge!
Leader: Our precious Daisies, at this time, you will officially become Daisy Girl Scouts. As we place this trefoil pin on your ribbon, notice that we will be placing it upside down. Each time you do a good turn, your parents can turn it for you, until you have it right side up.
Co-leader: We hope that by our next meeting, all of you have your pins right side up. We can’t wait to hear about your good turns! At this time, we will call you one by one to receive your pins.
(pin girls)
Leader: In addition to our newest members, we have several girls who are rededicating themselves tonight. I've worked with these scouts, and helped them to grow. I'm sharing them now, but want you to know... These girls are precious, as precious can be. Love them, take care of them, and you will see a bright new memory with every day. They grow in such a special way.
(pin girls)
Candle Ceremony
Leader: This candle represents the spirit of Girl Scouting. It burns eternally to represent the friendship and fun we will enjoy together.
(lights center, big yellow, candle)
Co-leader: This candle represents tonight’s investiture by welcoming our new girl scout sisters
(lights first small candle)
Leader: This candle represents our girl scout sisters who have rededicated themselves to a new year of scouts
(lights other small candle)
ALL: Line up to do a semi-circle friendship circle (leader on each side) and sing the Friendship song, turning out when done
Make new friends,
But keep the old,
One is silver and the other’s gold!
Co-leader: Let us pause for a moment in this rededication and investiture, quite mindful of the Girl Scout Promise and Law to uphold, remembering our duty, to serve God and country, and to live our lives by the Girl Scout law. And so when we travel away from each other, we will still be alike in our hearts and our minds. Girl Scouting will guide us, our Promise will bring us together as the great world of the Girl Scouting sisterhood.
Leader: We proudly present to you the Daisies of troop {#}!
In addition to the pins, we made a few fun things for the girls. Our fearless leader is a nifty knitter, and knitted some fabulous hats for the girls. I made some awesome pencils for the girls much like these pencils, and we made some cool certificates for them. At this very moment, I still need to make rededication certificates, but I did finish these nifty investiture certificates:

Here's the full version in case you want to use it:
Investiture Certificate
And, we also made a rededication certificate that is very similar to the investiture certificate:
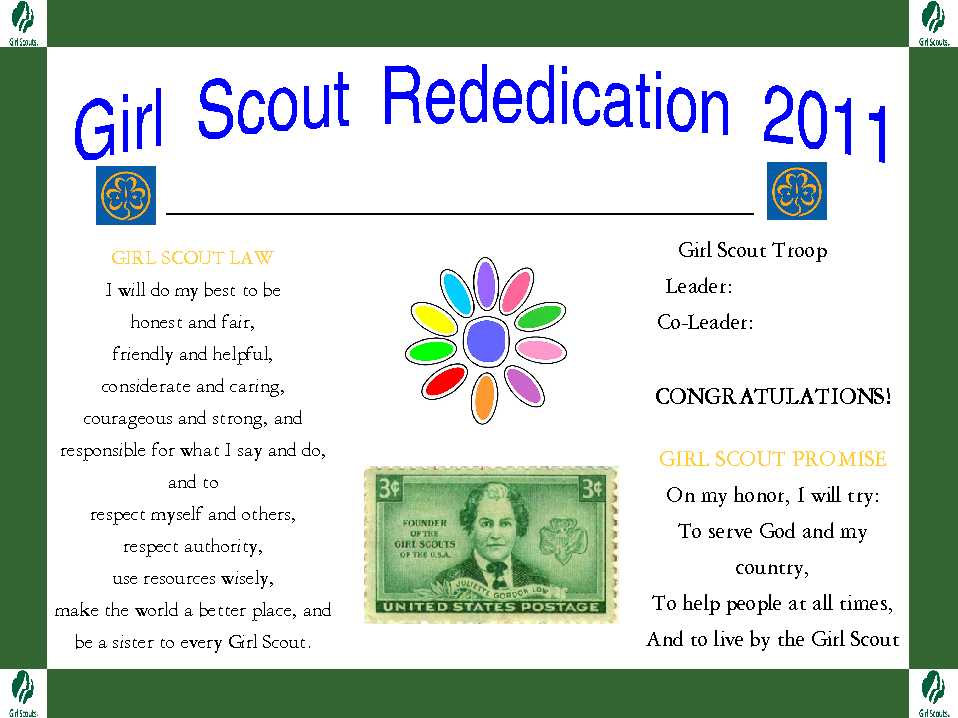
For full version, go here
The day of our ceremony is also going to be our kick off the year party for our meeting. Our plan is to practice the ceremony once or twice, and then let the girls let loose and have fun. We're going to have some fun games for them to play. An hour after our meeting we will be having the ceremony, with a pot luck dinner to follow. We still have a few weeks to go before our ceremony, so that means the girls should all remember their lines by then (we sent out the ceremony cards after meeting 3, and our ceremony will be after meeting 6).
First site we looked into was this one. We thought it was a good jumping point, and we knew we liked the idea of having each girl being able to say something. That lead us to this gem. We took the second part and put that into our ceremony. After that, we started looking for something that we could do to involve candles. Our fearless leader thought it might be a really nice touch (and I agree!). While searching, we stumbled upon (literally, used Stumbleupon) various candle ceremonies and got an idea for what we wanted to put in there.
In the mean time, we worked out the rest of the kinks for the ceremony. Seeing as how each girl will have a line, we made index cards. Each card had the girl's line on it, as well as who she would follow. The lines are short, and very easy. Some of the lines, as you can see from the ceremony above, are representative of the GS law. Next up, was making the board we would be using for the petals. Now comes the fun....
What you will need:
2 poster boards (1 can be in green)
1 roll of velcro, with sticky backing
hot glue gun
glue stick or a bottle of glue
scissors
1 cut out in each of the Daisy colors- blue, light blue, yellow, spring (light) green, red, orange, purple, magenta, green, rose, violet
For the full photo, head over here
2 short candles
1 tall candle, wrapped in yellow ribbon (or already yellow)
For the petals:
Step 1: Print out the petals over 4 sheets of paper (to do this, I used the program Print Shop, which allows you to "blow up" posters)
Step 2: Put together your 4-page "poster" of the petals over a poster board (to give it a "solid" backing)
Step 3: Begin to cut out your petals, but do not cut all the way (this allows you to properly line then up
Step 4: Place your velcro over each petal and the center
Step 5: Place the petals on your green poster board
Step 6: Finish cutting out your petals
Step 7: Using small post its, label each petal (so the girls know where to place it)
Ok, so maybe that was a little bit of overkill, but I'm a bit of a perfectionist (or as my husband puts it, slightly neurotic). In addition to the lines on the note cards, we also wrote which petal each girl will have to place, and who they will speak after. As you will see from our program below, not every girl has a petal to place, but it ended up working out to our benefit. Most of our troop is comprised of first graders, but we have a few kindergartners mixed in. We gave those girls the short lines that had no petals to place (we tried to make it easier on them). It killed me a little because those girls are super smart, but we had to be fair all around.
Obviously, the girls who are rededicating, will not be receiving their pins this year (since they got them last year). We didn't want to leave them out though, so I had a nifty little idea. I love working with Fimo (polymer clay), so I decided to make them some cute pins that we could give them (a "fun" pin). Now, onto the fun stuff!
Ceremony
Girls will line up and walk in, then line up at designated spot
ALL: Pledge of Allegiance
Leader: Welcome and thank you everyone for coming out tonight for troop {troop #}’s Investiture and Rededication ceremony. I’m {leader name}, and this is my Co-leader {co-leader name}.
Co-leader: Tonight we will be inducting our new girl scouts and welcoming back our returning girl scouts. We’d like to start out with one of the songs we start our meetings out with.
Opening song, I’m a Little Daisy
Petal Ceremony.....
Leader: Troop {#}, you are about to become Daisy Girl Scouts. Together we will
explore all the fun and adventures of Girl Scouting. Do you know about scouting?
Girl 1: The founder of Girl Scouts was named Juliette Gordon Low.
Girl 2: Her nickname was "Daisy".
Girl 3: We are named after her.
Girl 4: Together we will learn more about Girl Scouting.
Girl 5: The Girl Scout Promise is the pledge that tells us how to be good citizens and scouts.
(Place the blue Promise Center in center of felt board.)
Co-leader: In Daisy Girl Scouts, the girls will earn the 10 Learning Petals. Each petal is a different color, which represents a different phrase from the Girl Scout Law.
ALL: I will do my best to:
Girl 6: (place light blue petal on felt board)
Be honest and fair
Girl 7: (place yellow petal on felt board)
Be friendly and helpful
Girl 8: (place spring green petal on felt board)
Be considerate and caring
Girl 9: (place red petal on felt board)
Be courageous and strong
Girl 10: (place orange petal on felt board)
Be responsible for what I say and do
Girl 11: (place purple petal on felt board)
Respect myself and others
Girl 12: (place magenta petal on felt board)
Respect authority
Girl 13: (place green petal on felt board)
Use resources wisely
Girl 14: (place rose petal on felt board)
Make the world a better place
Girl 15: (place violet petal on felt board)
Be a sister to every Girl Scout.
ALL: Raise right hands and recite the Girl Scout Promise
On my honor, I will try:
To serve God and my country
And to live by the Girl Scout Law!
Pinning Ceremony
Leader: Each living thing begins as a small ray of light, of hope. The seed needs to be nurtured in order to grow. In Girl Scouts, these rays of hope are the girls of the world. Each seed is planted with love. The value of each young girl is recognized by older people-parents, siblings, friends, neighbors, leaders, and community members. Our Daisies have been nurtured in their homes and in their community. They are now ready to bloom!
Co-leader: Troop {#}'s Daisy meetings will be a place where each girl's individuality is valued. It will be a place where the importance of caring for ourselves and others will be emphasized. We will learn about our world and ways to care for nature. We will have fun! Our troop will be a place for each girl to live the new Girl Scout motto, "Girl Scouts. Where Girls Grow Strong!" We are here to greet the newest buds in the Girl Scout world. It is time for our new Daisies to emerge!
Leader: Our precious Daisies, at this time, you will officially become Daisy Girl Scouts. As we place this trefoil pin on your ribbon, notice that we will be placing it upside down. Each time you do a good turn, your parents can turn it for you, until you have it right side up.
Co-leader: We hope that by our next meeting, all of you have your pins right side up. We can’t wait to hear about your good turns! At this time, we will call you one by one to receive your pins.
(pin girls)
Leader: In addition to our newest members, we have several girls who are rededicating themselves tonight. I've worked with these scouts, and helped them to grow. I'm sharing them now, but want you to know... These girls are precious, as precious can be. Love them, take care of them, and you will see a bright new memory with every day. They grow in such a special way.
(pin girls)
Candle Ceremony
Leader: This candle represents the spirit of Girl Scouting. It burns eternally to represent the friendship and fun we will enjoy together.
(lights center, big yellow, candle)
Co-leader: This candle represents tonight’s investiture by welcoming our new girl scout sisters
(lights first small candle)
Leader: This candle represents our girl scout sisters who have rededicated themselves to a new year of scouts
(lights other small candle)
ALL: Line up to do a semi-circle friendship circle (leader on each side) and sing the Friendship song, turning out when done
Make new friends,
But keep the old,
One is silver and the other’s gold!
Co-leader: Let us pause for a moment in this rededication and investiture, quite mindful of the Girl Scout Promise and Law to uphold, remembering our duty, to serve God and country, and to live our lives by the Girl Scout law. And so when we travel away from each other, we will still be alike in our hearts and our minds. Girl Scouting will guide us, our Promise will bring us together as the great world of the Girl Scouting sisterhood.
Leader: We proudly present to you the Daisies of troop {#}!
In addition to the pins, we made a few fun things for the girls. Our fearless leader is a nifty knitter, and knitted some fabulous hats for the girls. I made some awesome pencils for the girls much like these pencils, and we made some cool certificates for them. At this very moment, I still need to make rededication certificates, but I did finish these nifty investiture certificates:
Here's the full version in case you want to use it:
Investiture Certificate

And, we also made a rededication certificate that is very similar to the investiture certificate:
For full version, go here
The day of our ceremony is also going to be our kick off the year party for our meeting. Our plan is to practice the ceremony once or twice, and then let the girls let loose and have fun. We're going to have some fun games for them to play. An hour after our meeting we will be having the ceremony, with a pot luck dinner to follow. We still have a few weeks to go before our ceremony, so that means the girls should all remember their lines by then (we sent out the ceremony cards after meeting 3, and our ceremony will be after meeting 6).
Subscribe to:
Posts (Atom)